How to Create & Use WooCommerce Rewards Points
“`htmlOptimizing Your WooCommerce Store for Better Visibility
To enhance the reach of your WooCommerce store, it’s crucial to ensure your products are easily discoverable. One effective strategy is leveraging the power of search engines. By optimizing your product listings and utilizing tools like best product search engine, you can increase your store’s visibility and attract more potential customers. This approach not only drives traffic but also complements your rewards system, encouraging repeat visits and purchases.
“`It is not difficult to launch an online store on the WordPress CMS platform, but it is very difficult to manage it for profit. This requires you to implement many features to provide the best user experience. The more your store grows, the more difficult it is for you to maintain the qualifications of your business.
One way to get more visitors to your store and buy your merchandise is to use points and rewards on top of special season discounts. This method can be simple but very effective in winning customer loyalty, which is why we want to present this method in our article.
We are going to give you a step by step guide on how to create and use WooCommerce points and rewards. Also, which parts should you include when setting up your points and rewards. The last section is a recommendation of the best WordPress plugin for WooCommerce stores to set up this feature.
Without further ado, let’s get started right now!
Benefits of Using Rewards Points in WooCommerce Shop
First, having points and rewards set up in your WooCommerce store is a great way to connect with customers quickly. Giving them this award is a motivation for customers to come back and order more products.

Secondly, as far as your store is concerned, you can get some benefits after implementing this reward system:
- Increase brand loyalty
- Increase customer lifetime value
- Helps increase customer conversions
- Get word of mouth for free
How to create and use WooCommerce Reward Points
In order to create and use points as a reward in WooCommerce stores, you need to integrate the plugin with your store. This gives you the ability to set up this process quickly and easily. Once you’re done, you’ll have a robust points and rewards system built into your website.
- Step 1: Install the Plugin
In the first step of the process, of course, you need to install and activate the plugin. To do this, go to the WordPress Dashboard-> Plugins. Then select “Add New” under this “Plugins” section and find the plugin you want to add in the search tab.
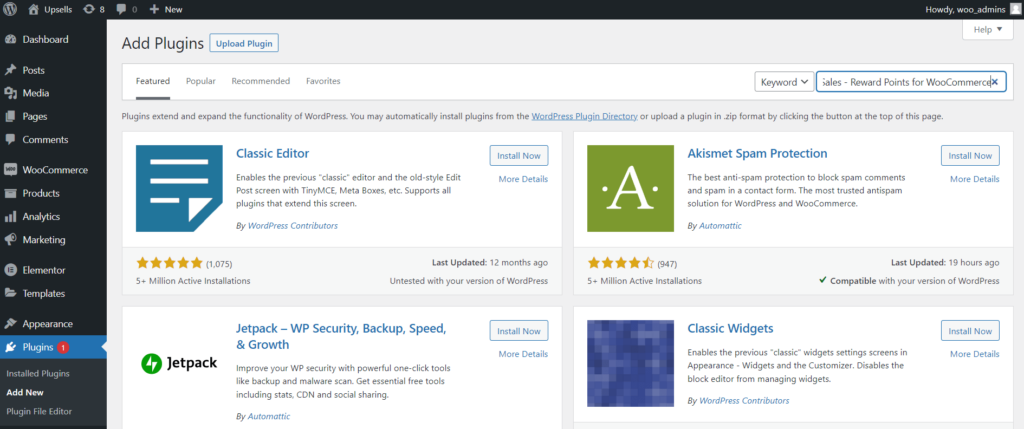
Once you find the plugin, click the Install Now button, wait for it to be installed in the WooCommerce settings by clicking the Activate button. You can also alternatively download the plugin zip file from the plugin website to your computer. You then simply upload the downloaded file to the Plugins section to begin installation and activation.
*If you are using the Pro version of the plugin, just download the archive with the PRO version of the plugin. Then go to the License tab and enter your email and
- Step 2: Let’s get acquainted with the plugin.
Once the plugin is installed and activated, you can move on to the second process, set up the bonus system. To do this, go to the WordPress dashboard -> Reward Points.
You will see on the screen, all sections of the plugin, which will help you effectively manage the bonus system. This is the main menu of the plugin, here you can fully control every detail of the bonus system.
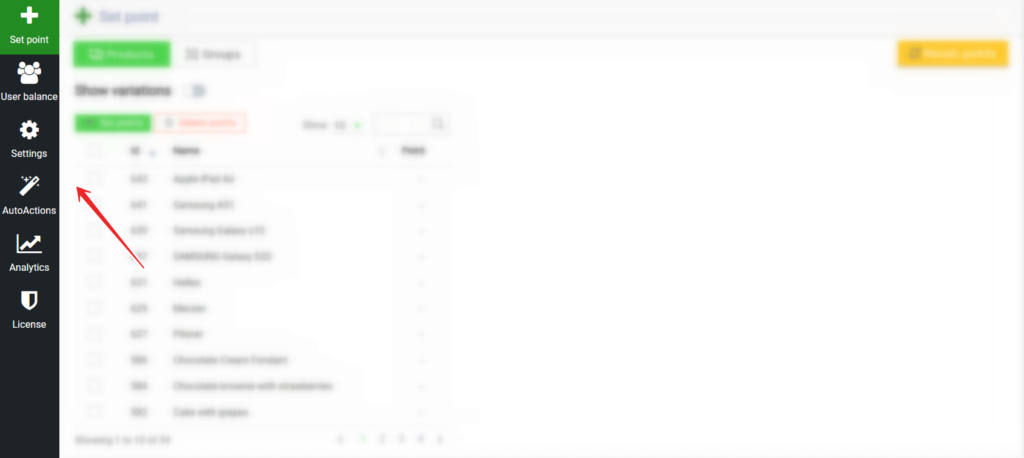
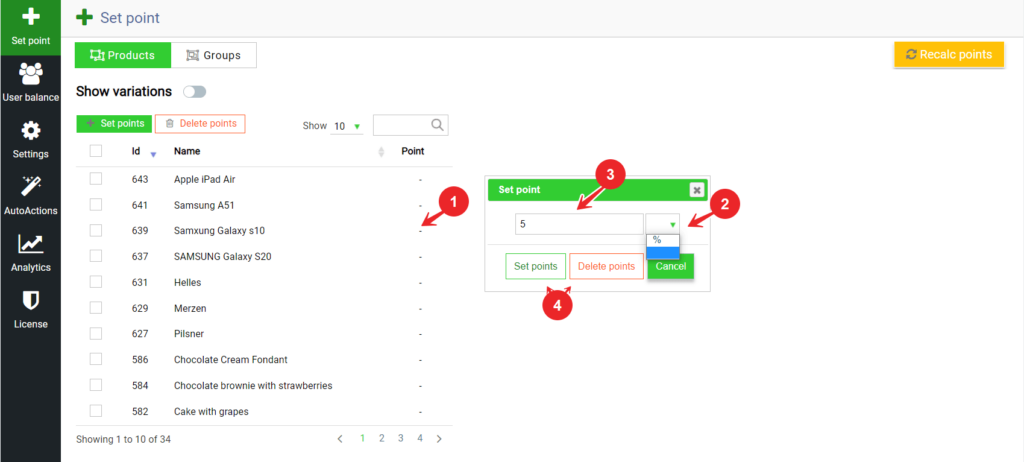
This is the “Set point” menu. This is where you can control how many bonus points your customers get for a particular product purchased.
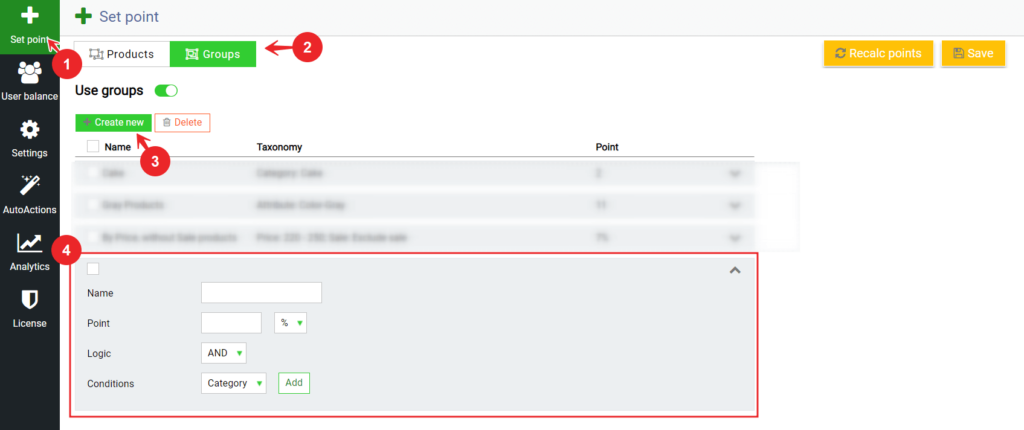
Moreover, you can not only set the reward manually, but also collect groups of products according to a certain attribute: prices, taxonomies, and so on.
This is the “Balance” menu. This is where you can control the current balance of bonus points of your users. Accrual/debit is available not only manually, but also in bulk, moreover, you can perform pending operations.
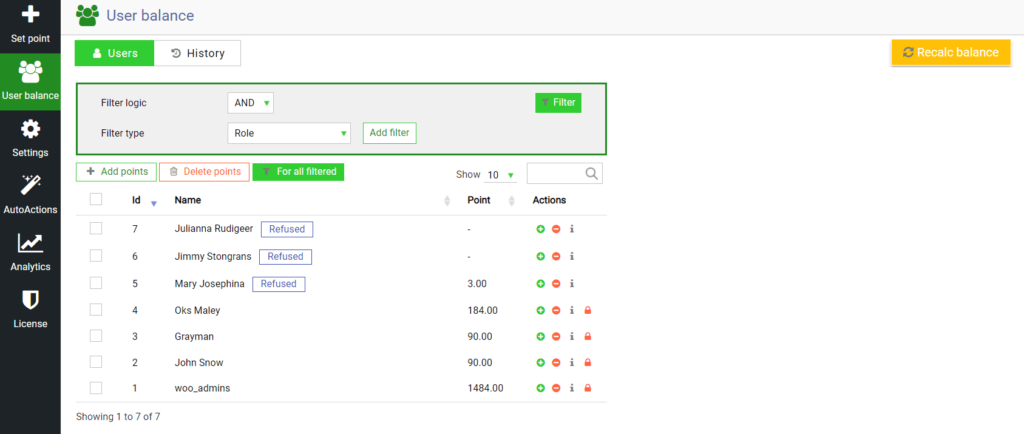
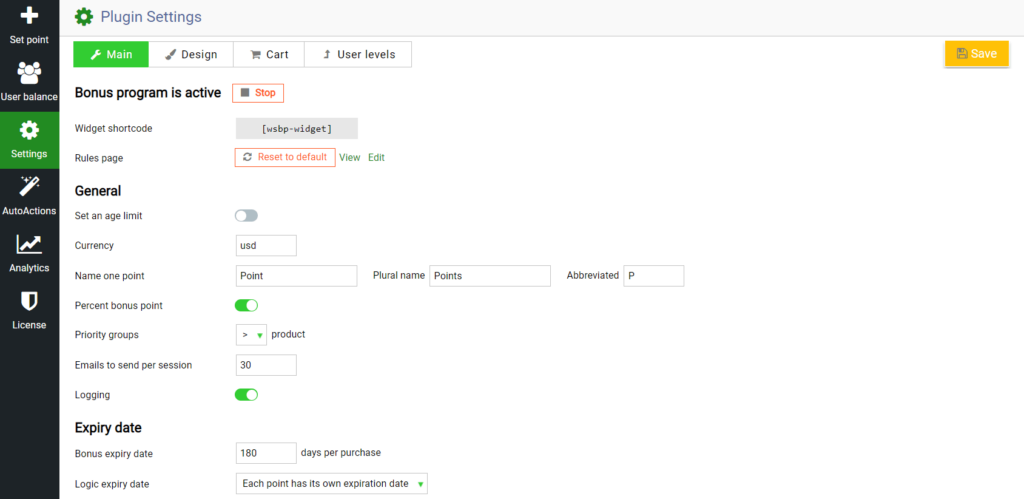
The Settings menu is a complete control point for the loyalty program.
Activate and stop the entire system, limit participation by age, set the expiration date, conditions for using bonuses, and of course the design of all elements (widgets) of the bonus system on the front.
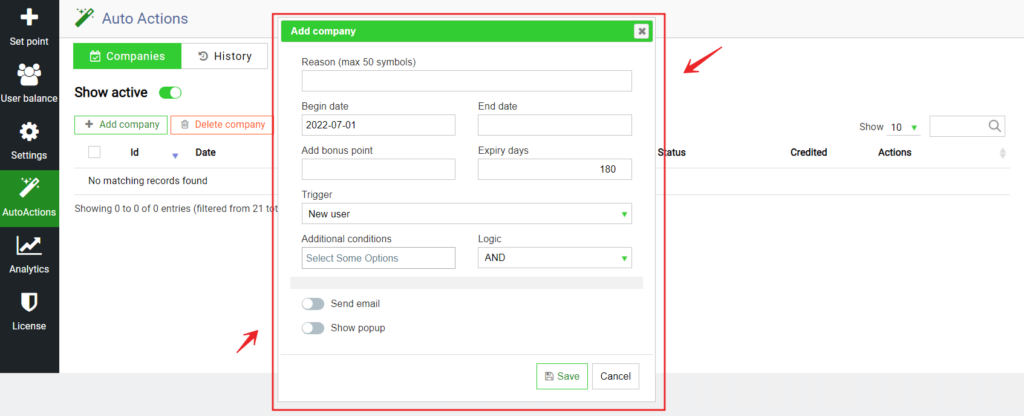
This magical section is called “Auto Actions”. It is here that you will be able to create companies for auto-calculation of bonuses, according to a huge number of triggers and conditions. Set a time frame for it, connect several triggers and conditions to each other, assign logic to them and then just relax – after all, we will do everything for you.
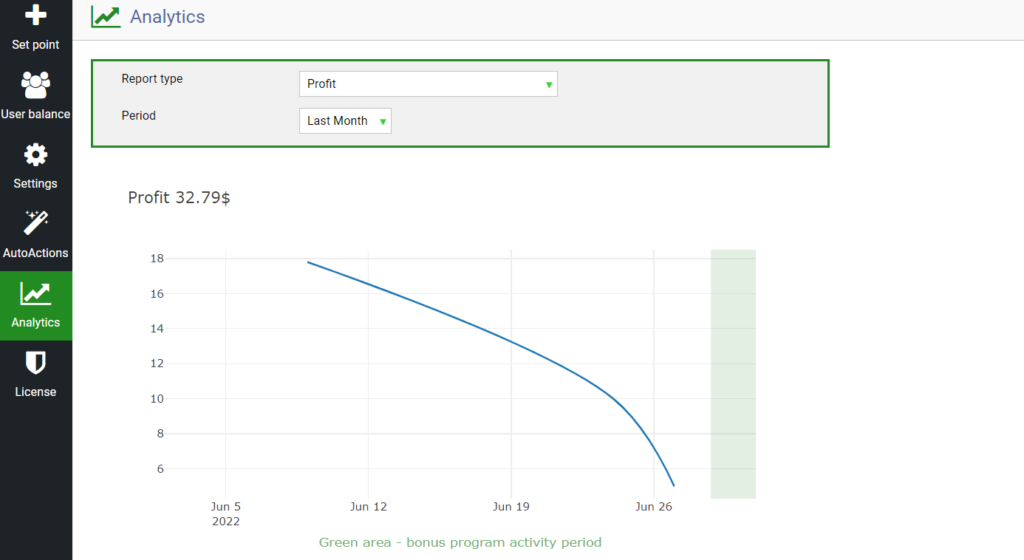
The analytics section is designed to help in obtaining a real-time status report, determining the most effective use, obtaining up-to-date data on the use of the bonus system and many other indicators.
- Step 3: Setting plugin options.
In step 2, we took a quick look at the sections available in the rewards plugin. So, in the third step – an important part of the guide – we will go through some guidelines for setting up the effective use of the reward points feature:
- To get started, set rewards for products/groups of products. For example, this is a great way to stimulate sales of a particular product, or, for example, an entire category, etc.
- Determine the main currency of the site, it is set in the settings of woocommerce itself. And in case of payment in another currency by the user, the points will be automatically converted.

- Look into the upcoming holidays and other occasions for earning points, such as the store’s birthday, New Year’s Day, or Black Friday. Go to the User Balance section and set the deferred accrual of points for these dates. This will delight your customers and encourage them to make purchases.

- Set up automatic scoring for iconic actions of your users.(Auto actions section) For example, accrual of points for registration, accrual of points on the user’s birthday, accrual of points for feedback, and so on. In general, in all cases that are important for your store.

- It is very important to predetermine what percentage of the total cart amount the buyer can pay off. Usually, store owners make it so that it is less than the percentage of markup on goods. Thus, you will always be in profit, no matter how many points the buyer would use in the shopping cart for payment. (settings section)
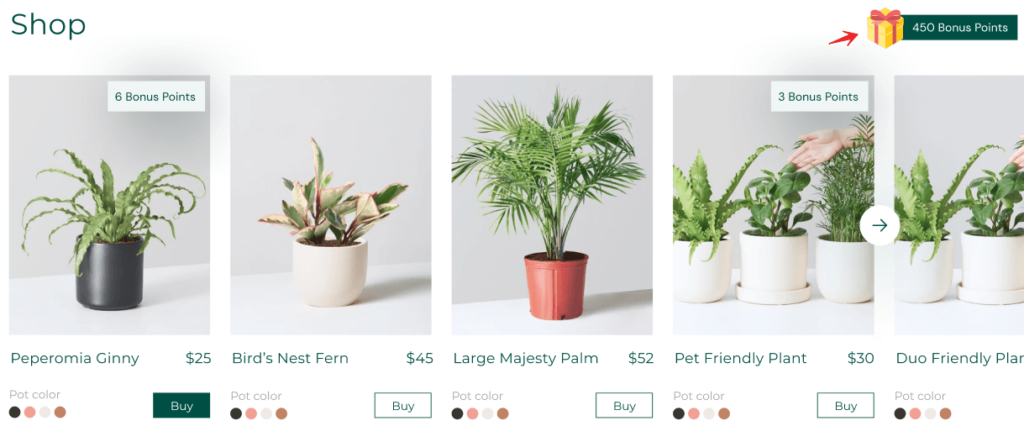
- Place the widget shortcode anywhere in your store. This will allow your users to always see their balance of bonus points and find a desire to spend them. What’s more, the design settings allow you to customize the design of this balance widget.
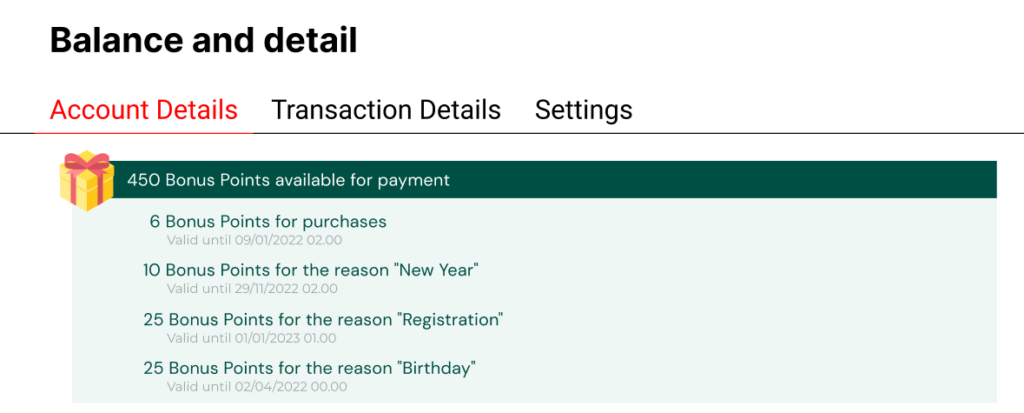
- Encourage users to buy by setting a limited expiration date for points. A very important advantage is that you can set different expiration dates for shopping bonuses and promotional bonuses.
- Attract the attention of users to products with the help of a badge of bonus points on the product card. What’s more, the design options allow you to customize this badge to match the style of your store. This can play an important role if you need to sell a particular product.

- Earn points for the amount of the cart. You can create an unlimited number of cart range levels for which the user can receive the specified number of points
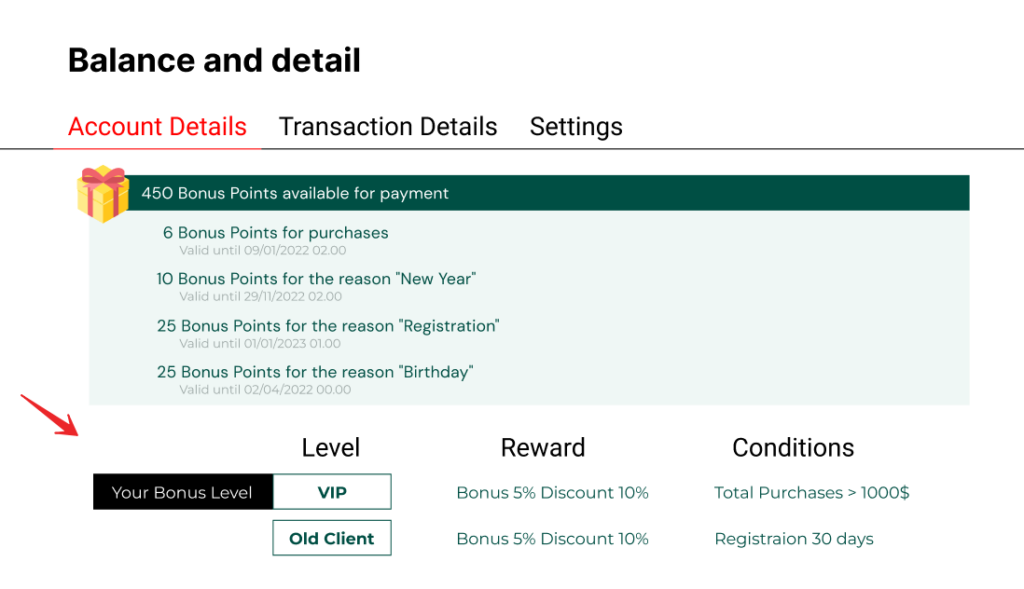
- Permanent discount by user levels. Create unique levels that users can reach for completed actions, such as the total amount of purchases, registration, roles and others, and reward them with a permanent discount
Final thought
Keep in mind that these are just minor recommendations – after all, different stores have different specifics. Therefore, your practice must be flexible, taking into account what goal you are pursuing.
The plugin is designed to help you improve your sales – increase your ROI (return on investment) and conversion rate. As a result, the bonus points system increases the long-term value of the customer.
That’s all! Now you can learn how to create and use UpSales – Reward Points for WooCommerce by following our detailed documentation step by step. If you encounter any problems during your practice, please feel free to contact us. We will support you as much as possible and explain all the nuances.
